Photo Library
Find every photo from a job and attach part numbers or tags so the report stays traceable. Photo Library is a Pro feature.
Before you start
You need the Pro plan for this gallery. On Free or Individual, attach photos on the part block in the Report Editor—there is no cross-report gallery on those plans.
How to get there
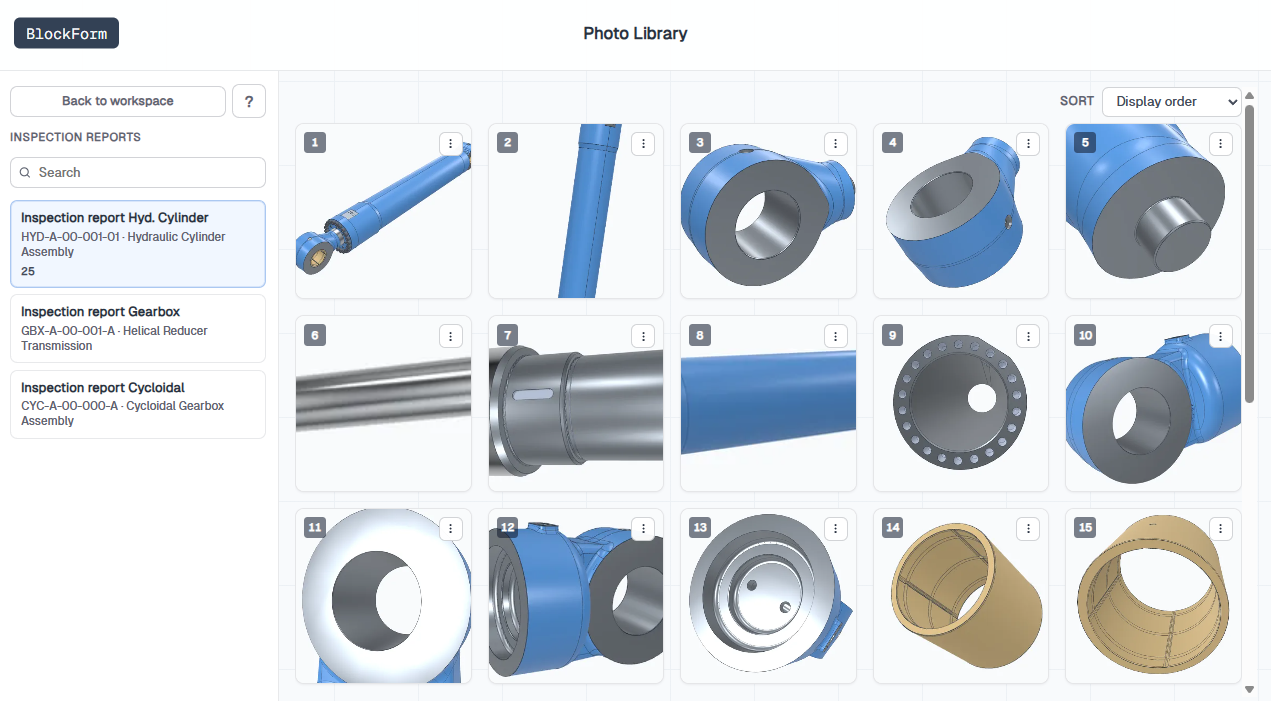
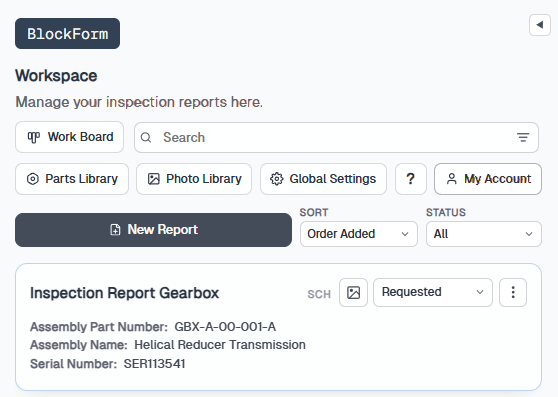
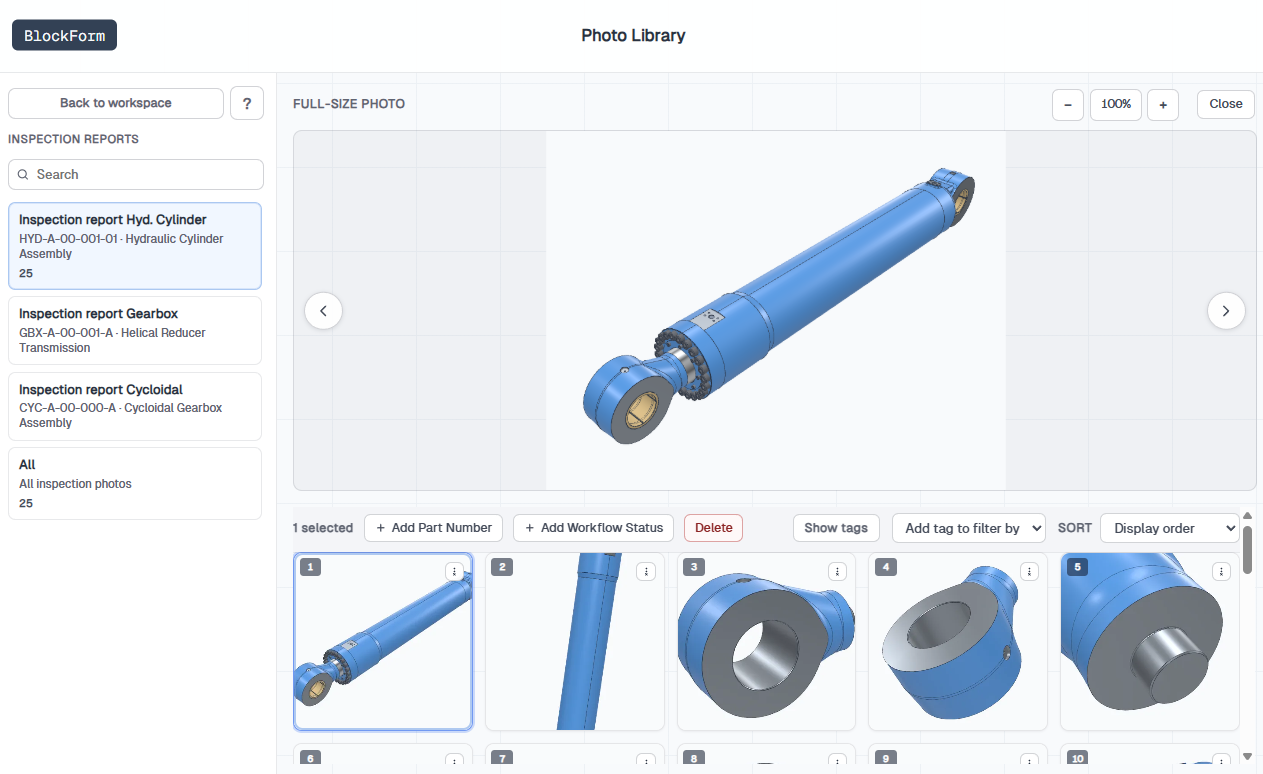
From the workspace, click Photo Library in the toolbar to open the Photo Library. You can also use the photo icon on an inspection card — that opens the library directly into that report's album. Photo Library is available on the Pro plan. Pick a report from the sidebar, browse the photo grid, sort the view, and attach part numbers, workflow stages, and equipment tags. Use the Tag filter to narrow by tags on the linked part, including Failure/Defect tags from Global Settings.
Browsing reports
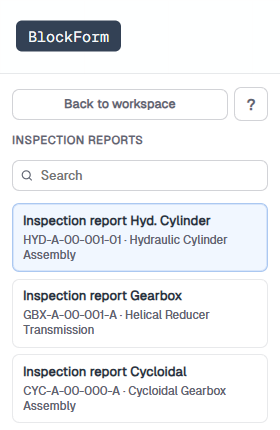
The left sidebar lists your inspection reports under Inspection reports. Use search to find a report by title or assembly details. Select a report to load its photos in the main grid. Each nav item shows the assembly part number and name when available, plus a photo count.
The grid shows thumbnail cards with a display-order badge and a menu on each photo. Use Back to workspace when you are finished browsing.
Sorting the gallery
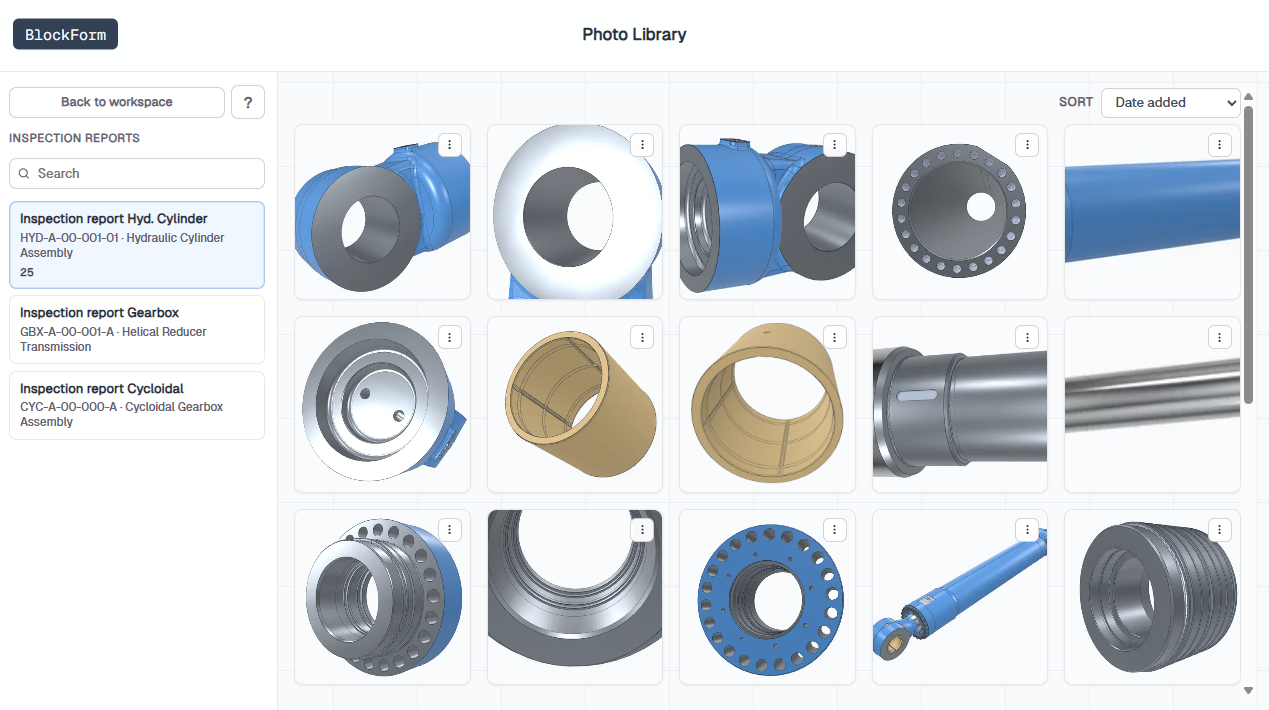
Use the Sort control above the grid to change how photos are ordered or grouped. Columns of thumbnails stay the same; only the order (and grouping labels when applicable) changes.
Display order (default view in the hero shot)
Follows the display order saved on the report — the same numbering you see on photo badges in the grid. Use this when you want the gallery to match how photos are arranged for the report.
Date added and Date taken
Both options sort the gallery chronologically. Date added uses when the photo was uploaded to BlockForm. Date taken uses the capture time from the image metadata when available, and falls back to date added if capture time is missing. Choose date taken when you care about when the photo was shot in the field; choose date added when you care about when it landed in the library.
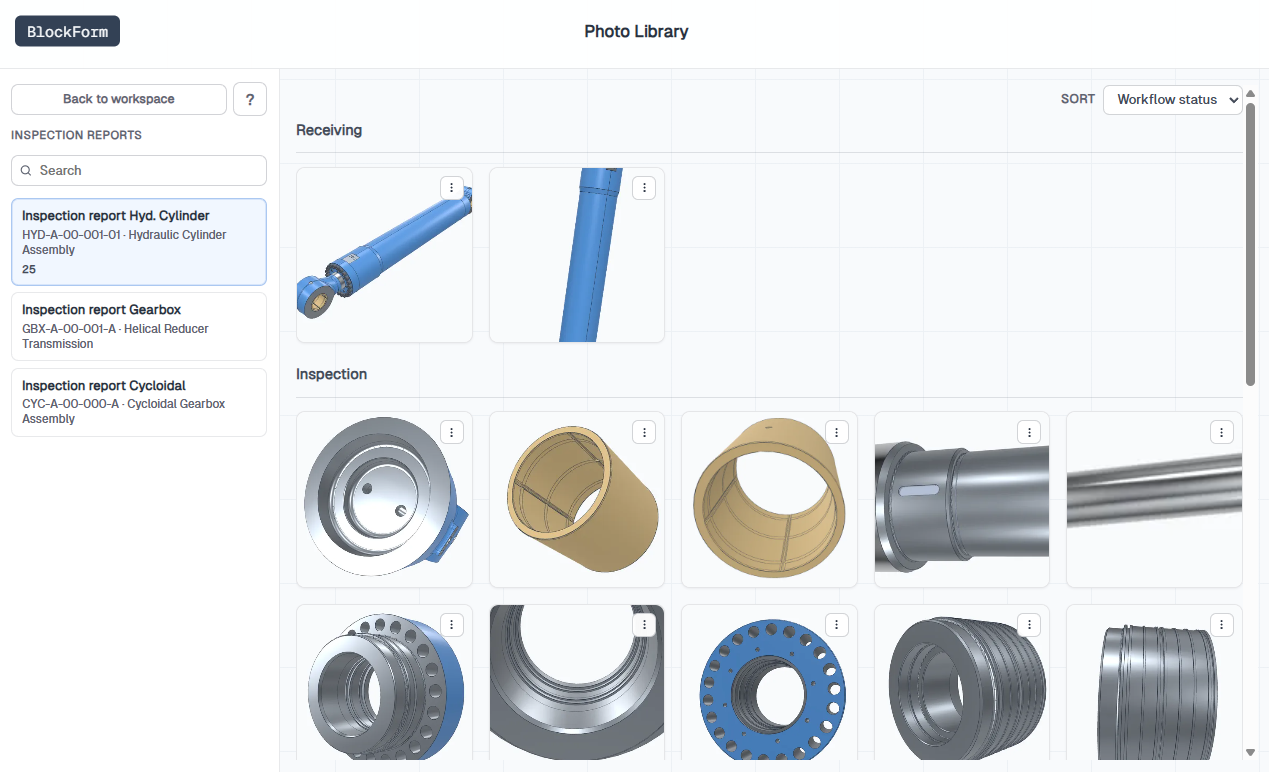
Workflow status
Groups photos by workflow stage — Receiving, Disassembly, Inspection, Assembly, Testing, Finished Product, and Shipping — so you can review evidence by stage of the job.
Part number
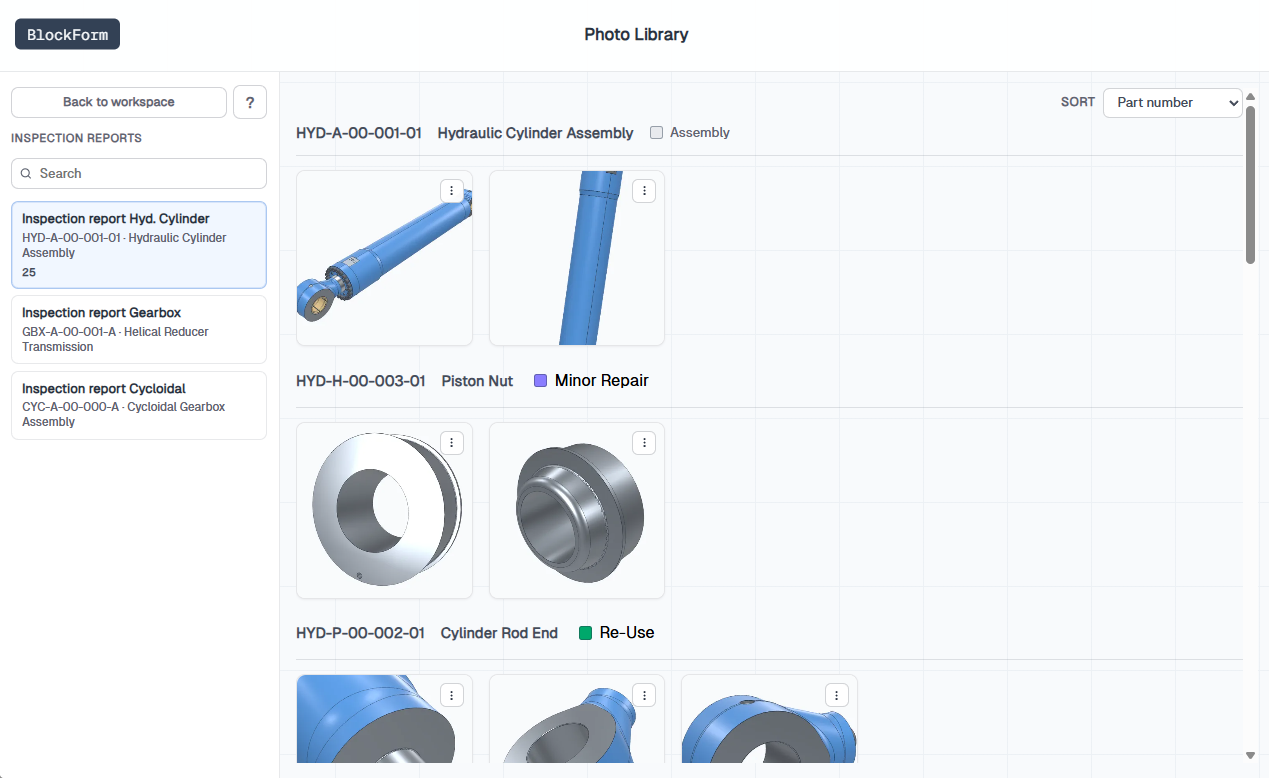
Groups photos by linked part number and name from the report BOM. Unassigned photos appear in their own group. Part number sort is available when the report has part rows to group against.
Tag filter
Use Add tag to filter by next to Sort to narrow the album. You can add multiple tags — including Parts tags and Failure/Defect tags from Global Settings — and each applied filter appears as a chip in the toolbar header. Click the × on a chip to remove that filter. Photos match if they have any of the selected tags. Untagged and No part appear when the album has matching photos. Sort still controls order and grouping (date, workflow, part number, and so on).
Photo actions
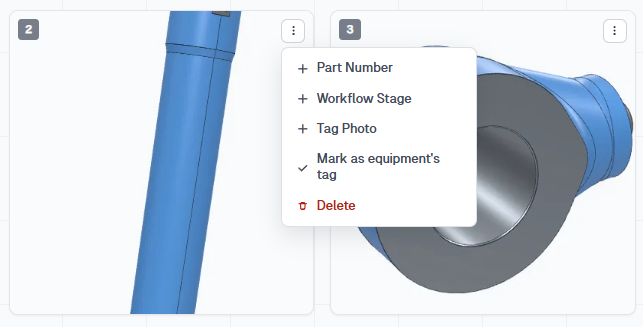
Open the menu on a photo card (⋮) to manage that image. You can also select multiple photos and use the bulk toolbar for shared updates.
- Part Number — link the photo to a part from the report so part-based sorting and report blocks stay aligned
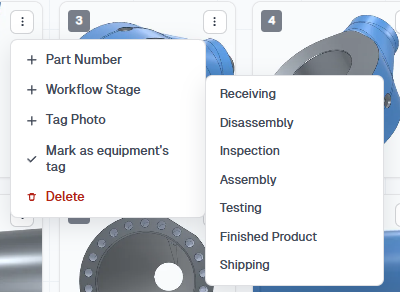
- Workflow Stage — set Receiving, Disassembly, Inspection, Assembly, Testing, Finished Product, or Shipping
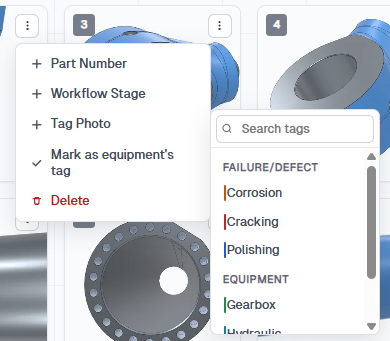
- Tag Photo — apply Failure/Defect, Equipment, and other tags from your catalog
- Mark as equipment's tag — set this photo as the identifying image for the equipment
- Delete — remove the photo from the album
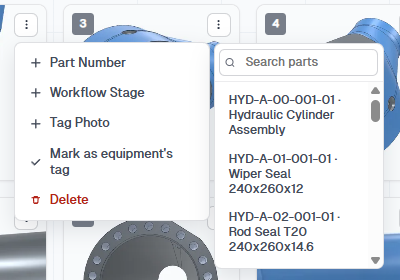
Part Number
Choose Part Number to open a searchable parts subwindow from the report BOM. Select a part to link the photo so part-based sorting and report blocks stay aligned.
Workflow Stage
Choose Workflow Stage to open a subwindow with the stage list. Pick a stage to group the photo under that step of the job.
Tag Photo
Choose Tag Photo to open a searchable tag subwindow. Tags are grouped by category (for example Failure/Defect and Equipment). Select one or more tags to apply them to the photo.
Use Mark as equipment's tag when this photo should represent the equipment — for example as the cover or identifying image on cards and lists. When that photo is already marked, the menu shows Unmark as equipment's tag so you can clear it.
Photos you organize here are available when you build collages in the Photo Collage Editor.
Full-size viewer
Click a photo thumbnail to open the full-size viewer. Zoom in or out, step through photos with the side arrows, then Close to return to the grid without leaving the Photo Library.
If you get stuck
- An upgrade wall appears — Photo Library is Pro. Attach photos on the part block instead, or see Account, plans, and sharing.
- A photo is missing from the library — it may have been added only on the report block. Open that report's album from the photo icon on the inspection card.
- Sort by Date taken looks wrong — if the file has no EXIF date, BlockForm falls back to the date the photo was added.