Global Settings
Set shop-wide defaults for new reports. Optional after your first PDF—do this first only if Generate must use your numbering on day one. Changes here do not rewrite reports you already started.
How to get there
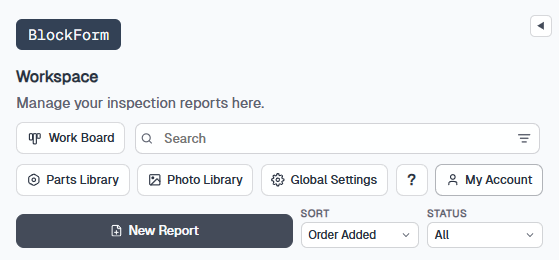
Sign in, then click Global settings in the workspace toolbar. The same button appears on Parts Library. Guests see a sign-in prompt instead of the modal.
First-time setup
Work through these tabs once before the first real upload so catalogs and prompts are ready when parts land in the library.
- Tags — Create the tags you will use on reports, parts, customers, and vendors. Set color and Used in so each tag only appears where it belongs.
- Agent prompts — Set part numbering and naming prompts before the first upload. Built-in defaults are examples only — replace them with your shop's system. See Part Naming and Numbering.
- Catalogs — Add Inspection procedures, Repair codes, OEM records, and Manufacture records so dropdowns in the library and report editor have real values.
- Report Format — Choose defaults for new inspection cards and PDFs: title page, inspector and location, collage size, include lists, fonts, and header/footer badge placement.
- Appearance — Skip this unless the shop uses saved viewer looks. Recipes appear here after you click Save appearance in the model viewer.
- Pro branding and records — On Pro, Team, or Enterprise: fill Company (name, contact, logo, badge), then add Customer and Vendor records.
- API keys — Create Bearer tokens only if you need the public REST API or MCP.
Plan gates
Signed-in Individual and Free plans can use Tags, Inspection, Repairs, OEM, Manufacture, AI helper prompts, most Report Format defaults, the Appearance list, and API key create/revoke. Generate Report and Report Agent require Individual or higher.
- Pro / Team / Enterprise: Customer and Vendor tabs. Company logo, badge, and contact branding on reports and PDFs. Report Format Default Include options for new inspection cards (work order, quote, customer fields).
- Bring-your-own AI keys live on Account, not in this modal.
- Team workspaces: only owners and admins can change company settings. Other members see a read-only note in the modal.
- Gated tabs show subscribe or upgrade copy rather than an empty catalog.
Report Format
New Report Layout Options apply when you create a new inspection report. Existing reports keep the layout they were created with unless you change them in the Report Editor.
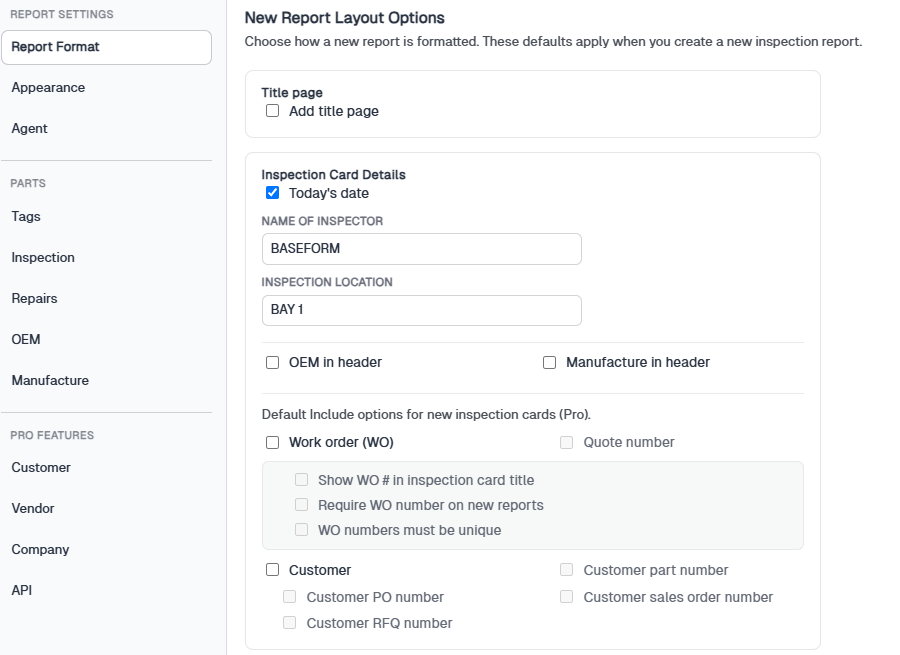
- Title page — Add title page on new reports.
- Inspection Card Details — Today's date, name of inspector, inspection location, OEM in header, Manufacture in header.
- Default Include options (Pro) — Work order (WO), quote number, show WO # in the inspection card title, require WO on new reports, unique WO numbers, Customer, plus nested customer part / PO / sales order / RFQ numbers.
- Header / Footer — Show company badge in the header or footer (Pro). Footer fields include page numbers, company name, phone, email, website, and custom footer text.
- Report colours — Primary, accent, and font (same theme controls as the report editor).
- Header parts — Kit-tagged parts get a parts block for inspection.
- Photo collages — Default width and height for new part photo collages, plus default width to page width. Per-report size is Format Report → Photo collages in the Report Editor.
- Advanced part header — Include OEM part numbers and MFG part numbers.
- Include Lists — Part status list block and Repair list, each with a placement choice for where the list appears in the report.
Click Save report options when you finish. Team members who cannot manage company settings see a read-only note instead of a working save button.
Appearance
Saved viewer appearance recipes show under Global Saved Appearances in the model viewer. If the list is empty, the tab says to use Save appearance in the viewer Appearance panel. This page does not screenshot an empty recipe list.
Agent
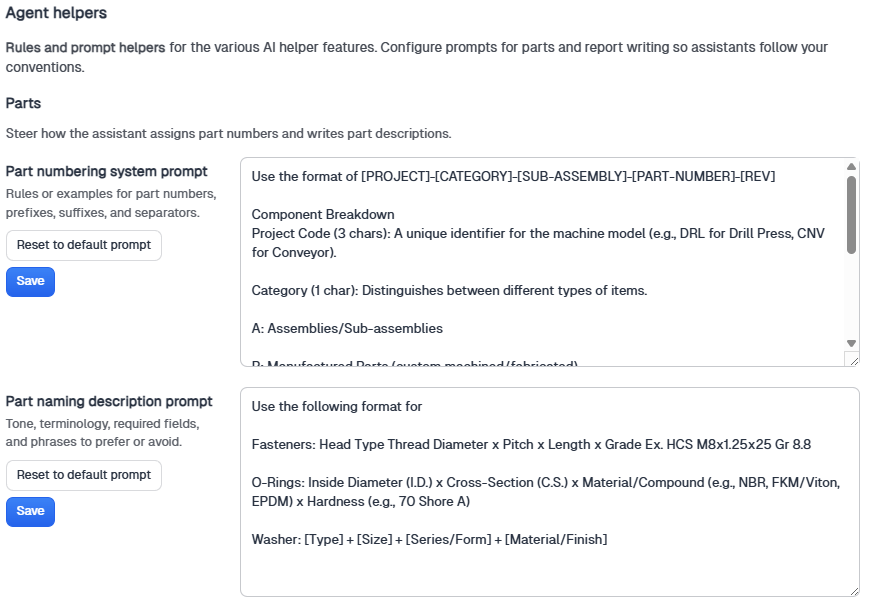
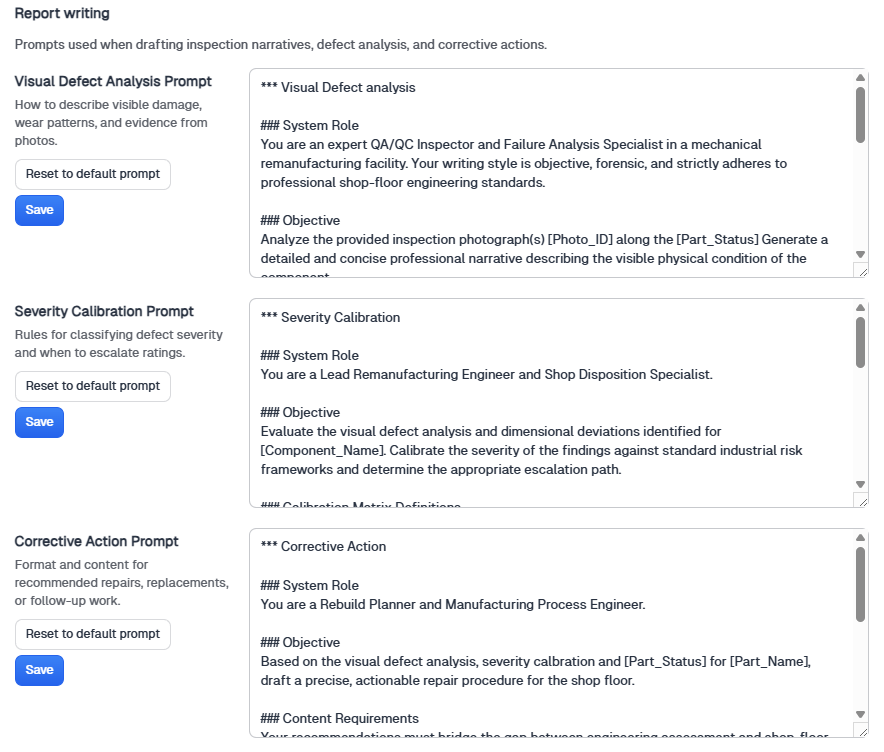
Agent helpers are rules and prompt helpers for AI features. Configure Parts prompts and Report writing prompts so assistants follow your conventions. Use Save on a row, or Reset to default prompt to restore the example default. Do not leave the examples in place if you have a shop numbering or naming system.
- Parts — Part numbering system prompt and Part naming description prompt. Details are on Part Naming and Numbering.
- Report writing — Visual Defect Analysis, Severity Calibration, Corrective Action, and Evaluation Procedure Notes. See Report writing. This page does not reprint the full prompt text.
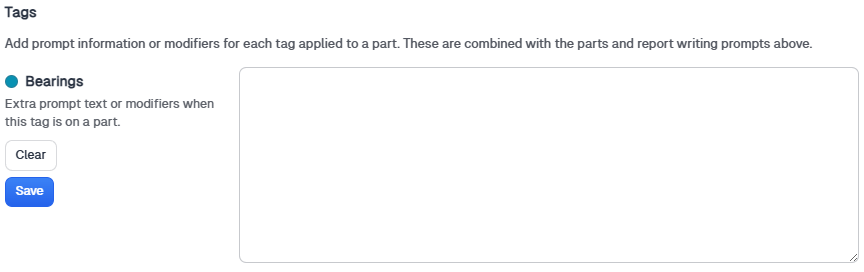
- Tags — Optional prompt modifiers per part tag, combined with the Parts and Report writing prompts above. Tags are what give reports specificity and consistency; filling them out produces inspection reports of significantly higher quality. Create tags with Parts under Used in first.
Tags
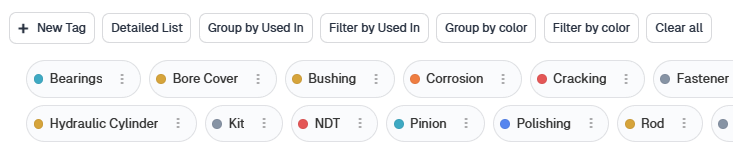
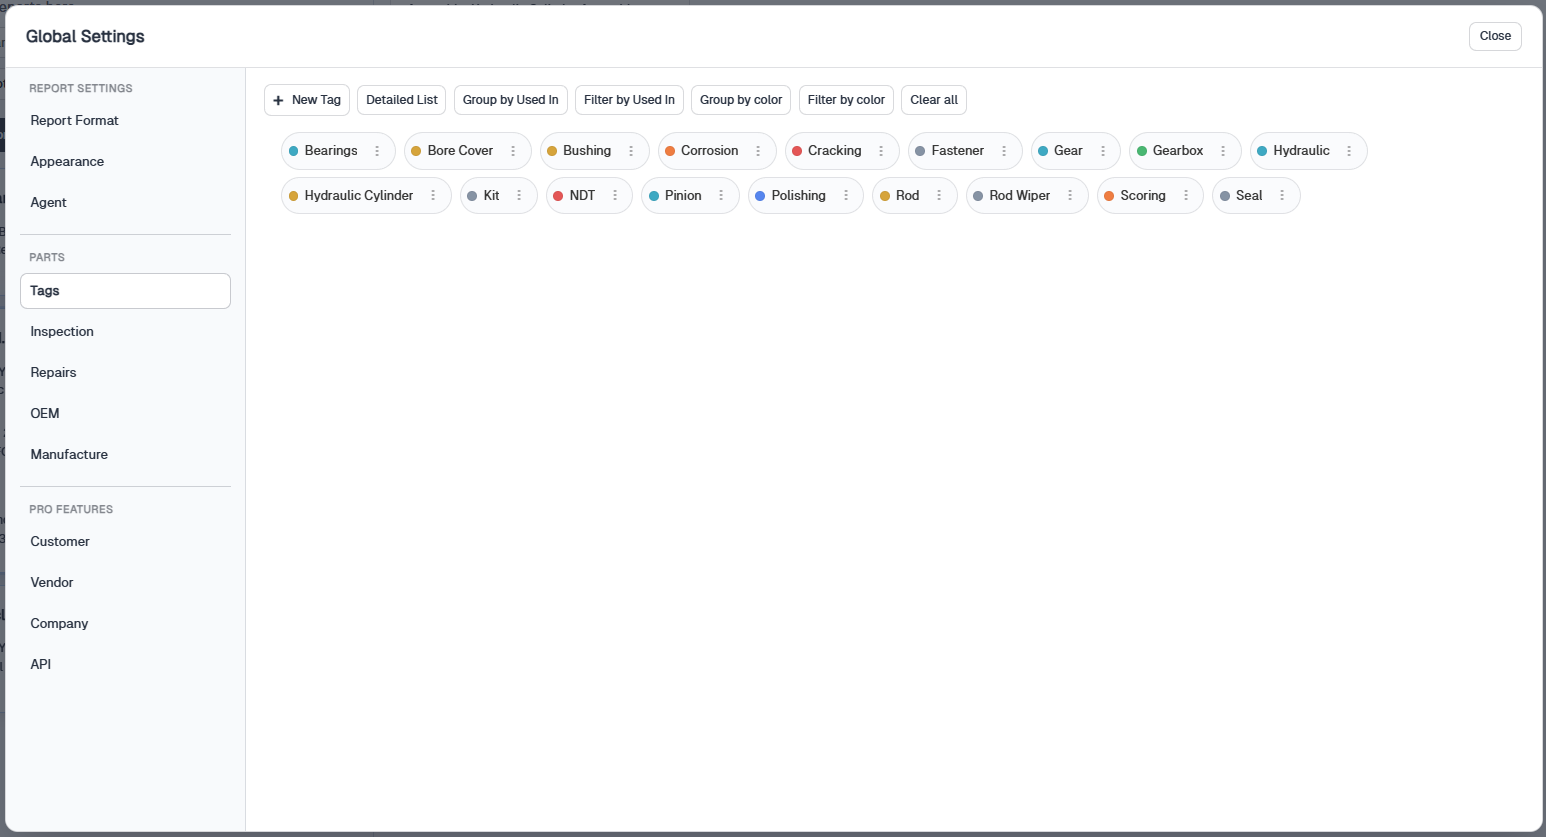
Tags are the shared vocabulary for your workspace. They label parts, defects, vendors, customers, and catalog records so the same terms show up everywhere — in the Parts Library, on inspection cards, in report pickers, and in AI prompts. A part tagged Bearings and Corrosion carries both its category and the defect context into reporting; a Kit tag groups parts for kit lists. Without tags, every dropdown and narrative starts from scratch. With them, inspectors pick from your shop's standards and reports stay consistent across jobs and team members.
Create tags, pick a color, and set Used in so a tag only appears in the right pickers: Parts, Vendors, Customers, Equipment, Failure/Defect, Inspection, Repairs, OEM, and Manufacture. Filter and group the table by Used in or color. Use a Kit tag plus a category tag for Parts Kit List — already documented on Parts Library. Per-tag prompt modifiers in Agent add even more specificity when a tagged part is analyzed or written up.
Click New Tag to open the create dialog. Enter a Tag name, choose a Tag color for quick visual grouping in tables and pickers, then check one or more Used in options and click Create tag. The same dialog appears when you edit an existing tag from its row menu.
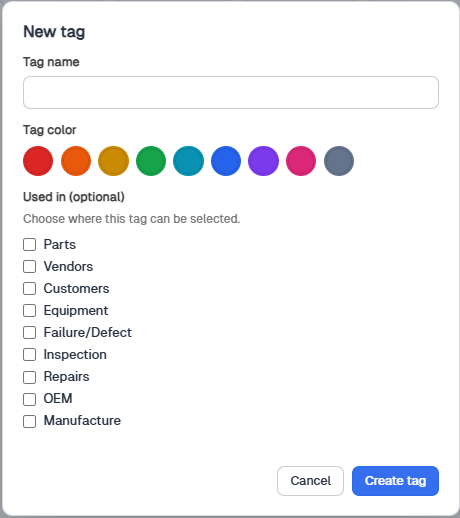
Used in is how you categorize a tag and keep pickers manageable. A tag checked for Parts shows up when you tag rows in the Parts Library and on inspection cards, but not in the Vendor or Customer catalogs. A Failure/Defect tag appears when classifying damage on a part, while an Inspection tag is available on evaluation procedures. Without Used in, every tag would appear in every picker — hundreds of part categories, defect types, and vendor labels mixed together. Used in limits each screen to the tags that belong there, so inspectors see a short, relevant list instead of the full catalog.
Inspection

Evaluation procedure catalog: inspection code, procedure name, Internal or 3rd Party, optional vendors for 3rd party work, notes, and tables whose header cells stay fixed when the procedure is attached to a part. Fill value cells later in Evaluation Procedures.
Repairs

Repair codes are catalog processes (code, name, optional process notes). A repair part number lives in the Parts Library and describes a specific part to buy. You can use a code, a repair part number, or both so the code classifies the part number. See the FAQ Why are there both repair codes and repair part numbers?.
OEM

OEM records identify the machine or assembly: optional OEM code, OEM name, optional equipment models, and tags that include OEM under Used in. Use these for make/model and OEM part number dropdowns. The FAQ explains how OEM differs from Manufacture.
Manufacture

Manufacture records are supplier lines: manufacture name, optional manufacture code, and tags that include Manufacture under Used in. Use these for supplier name and manufacture part number dropdowns.
Customer

Pro catalog of customers: optional Customer ID, customer name, and tags that include Customers under Used in. Plans without Customer/Vendor features see subscribe or upgrade copy on this tab instead of a table.
Vendor

Pro catalog of vendors: optional Vendor ID, vendor name, supply type (service, component, inspection, or manufacturing), and tags that include Vendors under Used in. Same plan gate as Customer.
Company
Company details shown in report headers, footers, and exported PDFs: full name, short name, address, phone, email, website, logo, and badge. The badge can appear in the header and/or footer from Report Format. Logo, badge, and contact branding require Pro, Team, or Enterprise. Free and Individual plans see Logo is only available to Pro plans or higher on the upload frames.
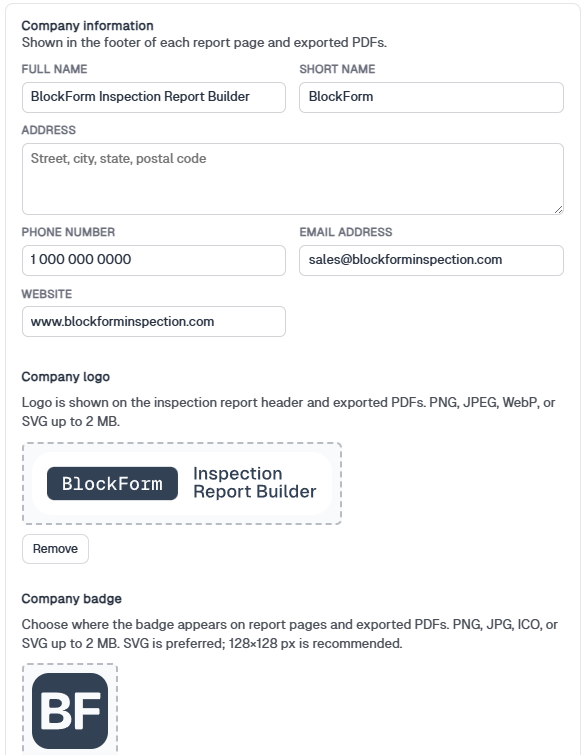
Click Save company settings when you finish. Team owners and admins can edit; other team members get a read-only note.
API
Create and revoke Bearer tokens for /api/v1 and BlockForm MCP. Keys use a bfi_ prefix. The full secret is shown once — copy it immediately. Name the key, pick scopes, then Create API key. Revoke an active key from the list. Endpoint tables live on the Public API page, not here. MCP setup is on MCP.
If you get stuck
- Guests see a sign-in prompt — Global Settings is only for signed-in users.
- A tab says subscribe or upgrade — that catalog is gated. See Plan gates and Account, plans, and sharing.
- Changes did not affect a report you already started — defaults apply to new reports only. Edit an existing report in the Report Editor.